Thursday, March 6, 2014
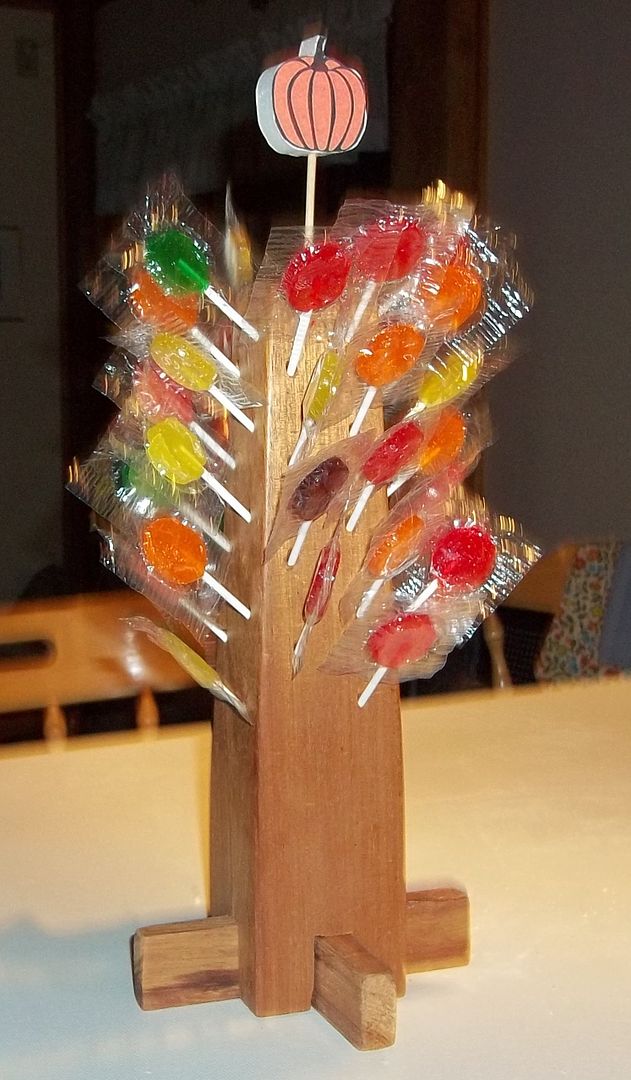
Candy tree
I was also thinking that you could make this a Christmas tree shape, and drill the holes deeper and use the sphere-shaped lollipops. They would look like ornaments!
Wednesday, March 5, 2014
Make a childs art easel Help fight cancer
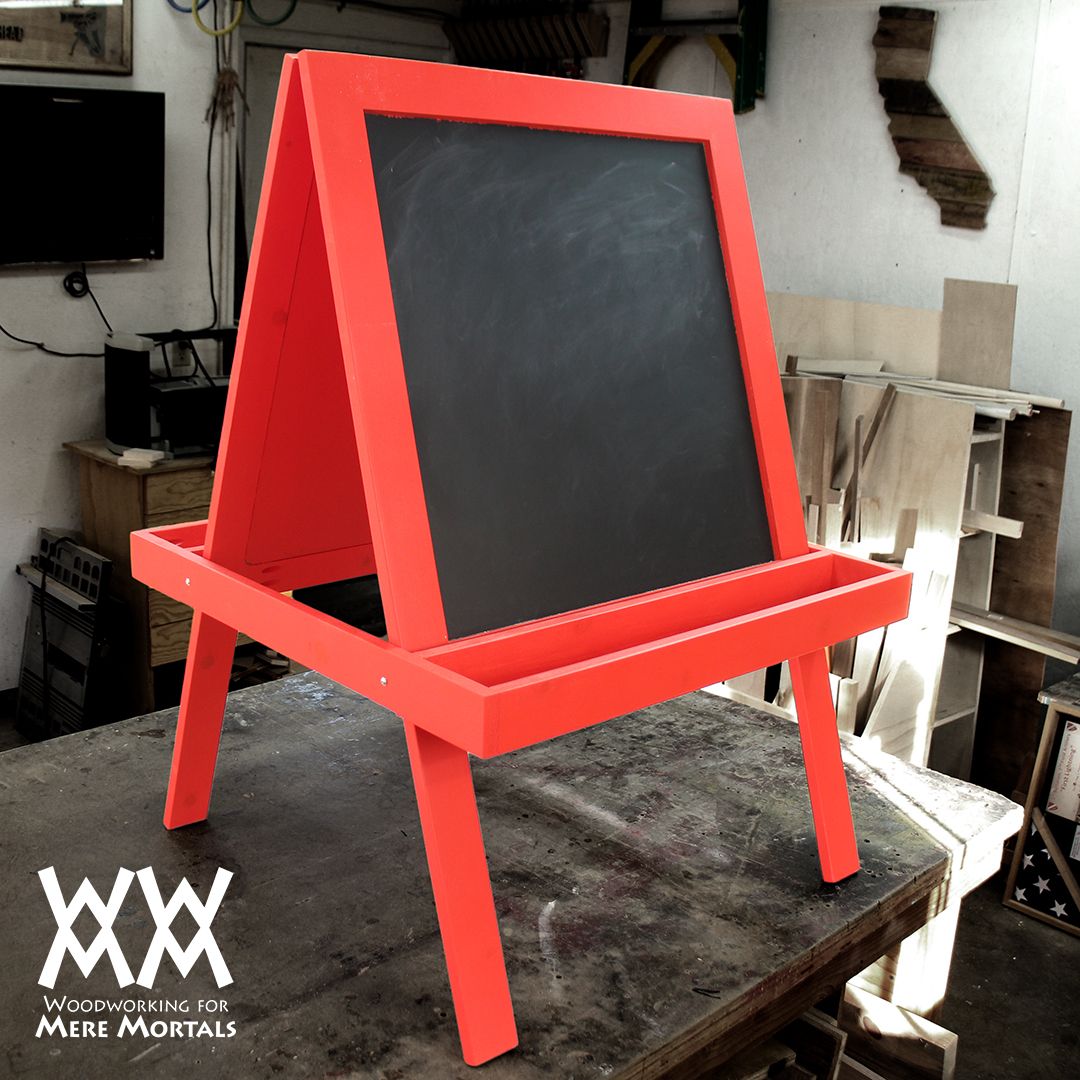 Every year at this time, Marc (The Wood Whisperer) builds a simple project to raise money for a cancer charity. This year, he built a kids art easel based on plans from Wood Magazine and is donating $5 to CancerCare on behalf each of his viewers who makes one and sends him a photo.
Raise money for charity by doing what you love: woodworking!
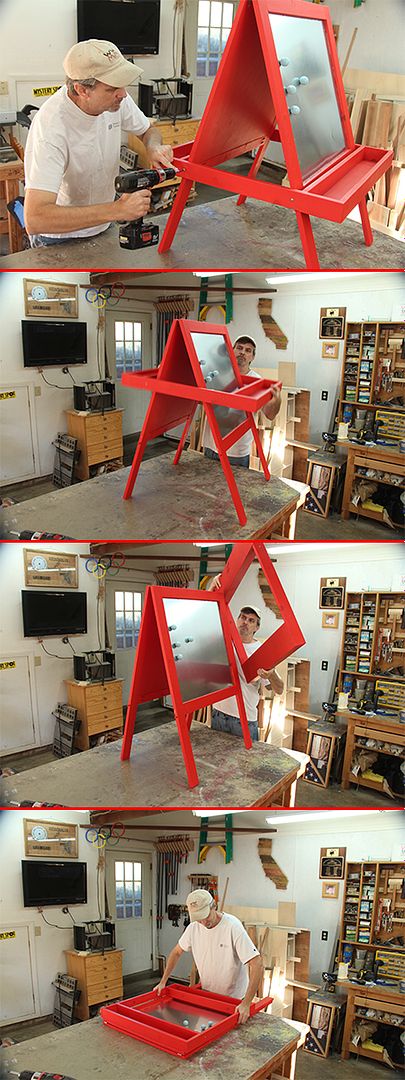 When I saw the easel I thought this would make a great project for my viewers too, so I asked Marc if we could combine forces. My version is very similar to his, just a bit simpler. I am also going to donate $5 for every easel made. Thats ten bucks between the two of us, not to mention the matching donations provided by many corporate sponsors! We are hoping to raise $10,000 for CancerCare, an organization that provides support for people who are struggling with cancer. You can also donate directly, of course!
Auction
Since Wyatt is 16, hes a little tall to get use out of this easel, so I am auctioning it off! Please bid on it here. 100% of the winning bid goes to CancerCare.
If you dont have any young artists to build an easel for, consider making one and donating it to a local childrens hospital or care center. What a great way to kick off the holiday season!
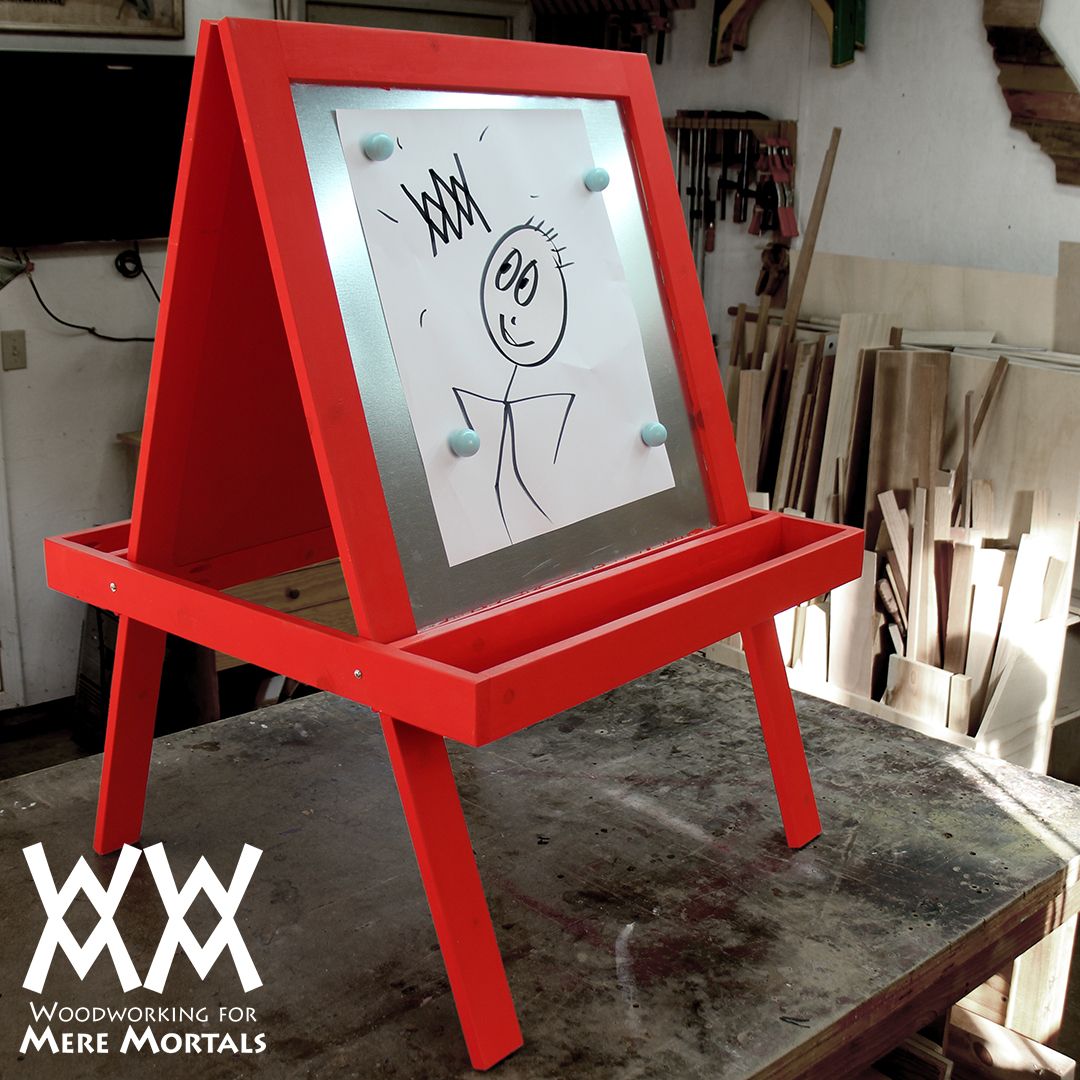
Make either version you prefer, or even combine elements from each. The goal is to get as many of you building an easel as possible. Be sure to watch Marcs video below, which explains everything much more eloquently than I!
- Free Wood Magazine version
- WWMM version. (Simplified)
- WWMM Sketchup file
Important links
- Details on Marcs easel, and all the materials you will need.
- More about Woodworkers Fighting Cancer
- Submit your project
- About CancerCare
**********
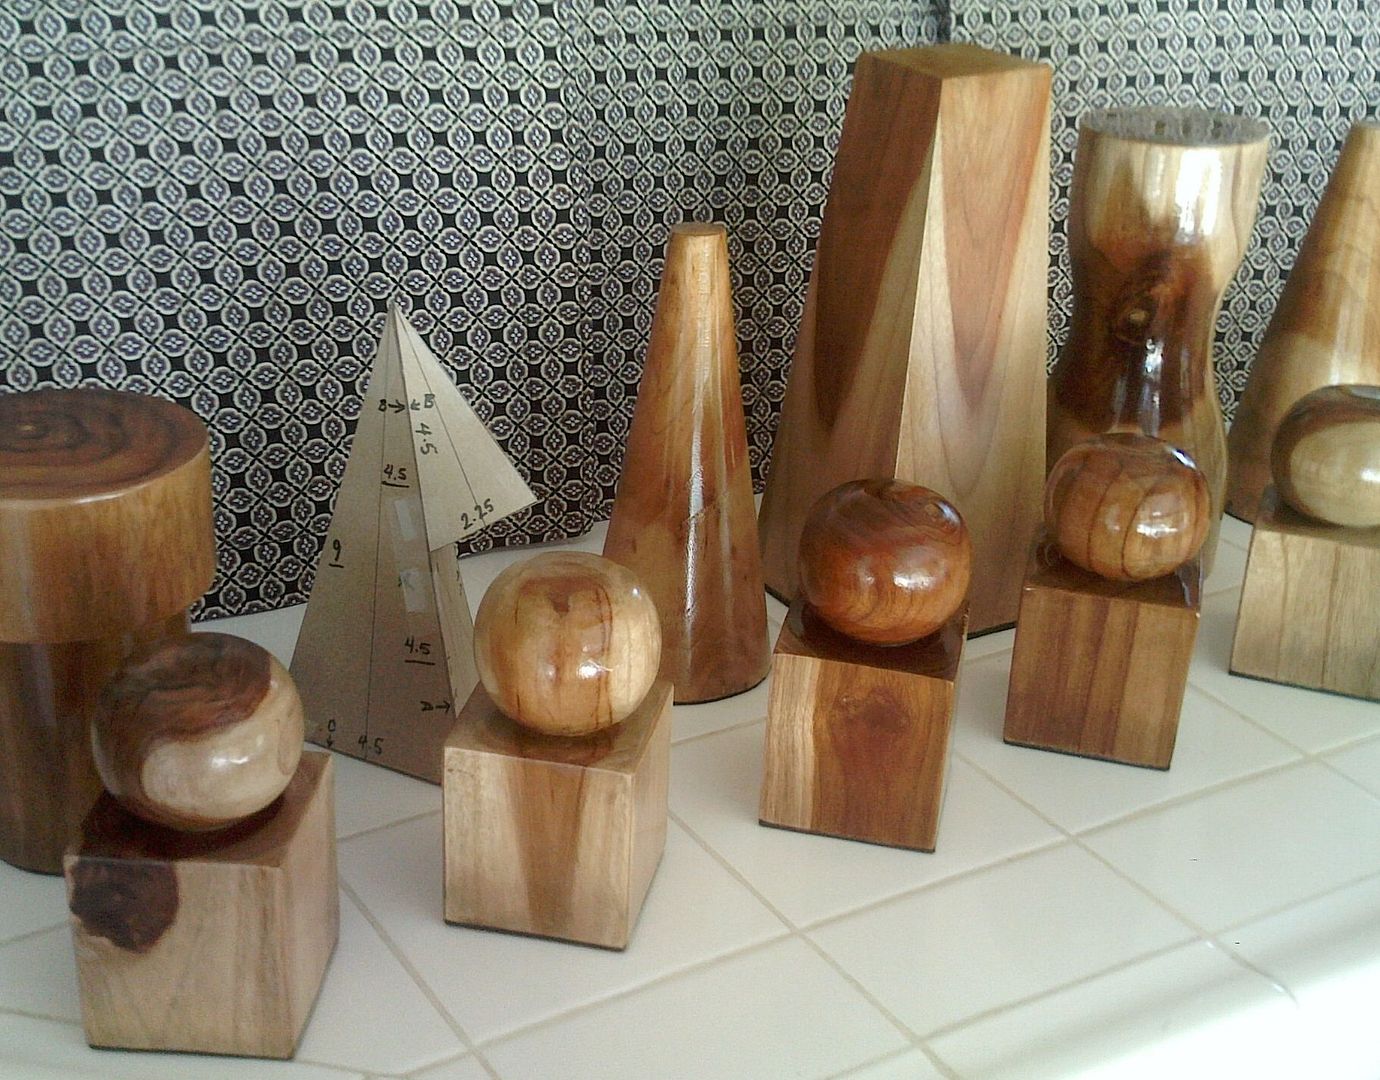
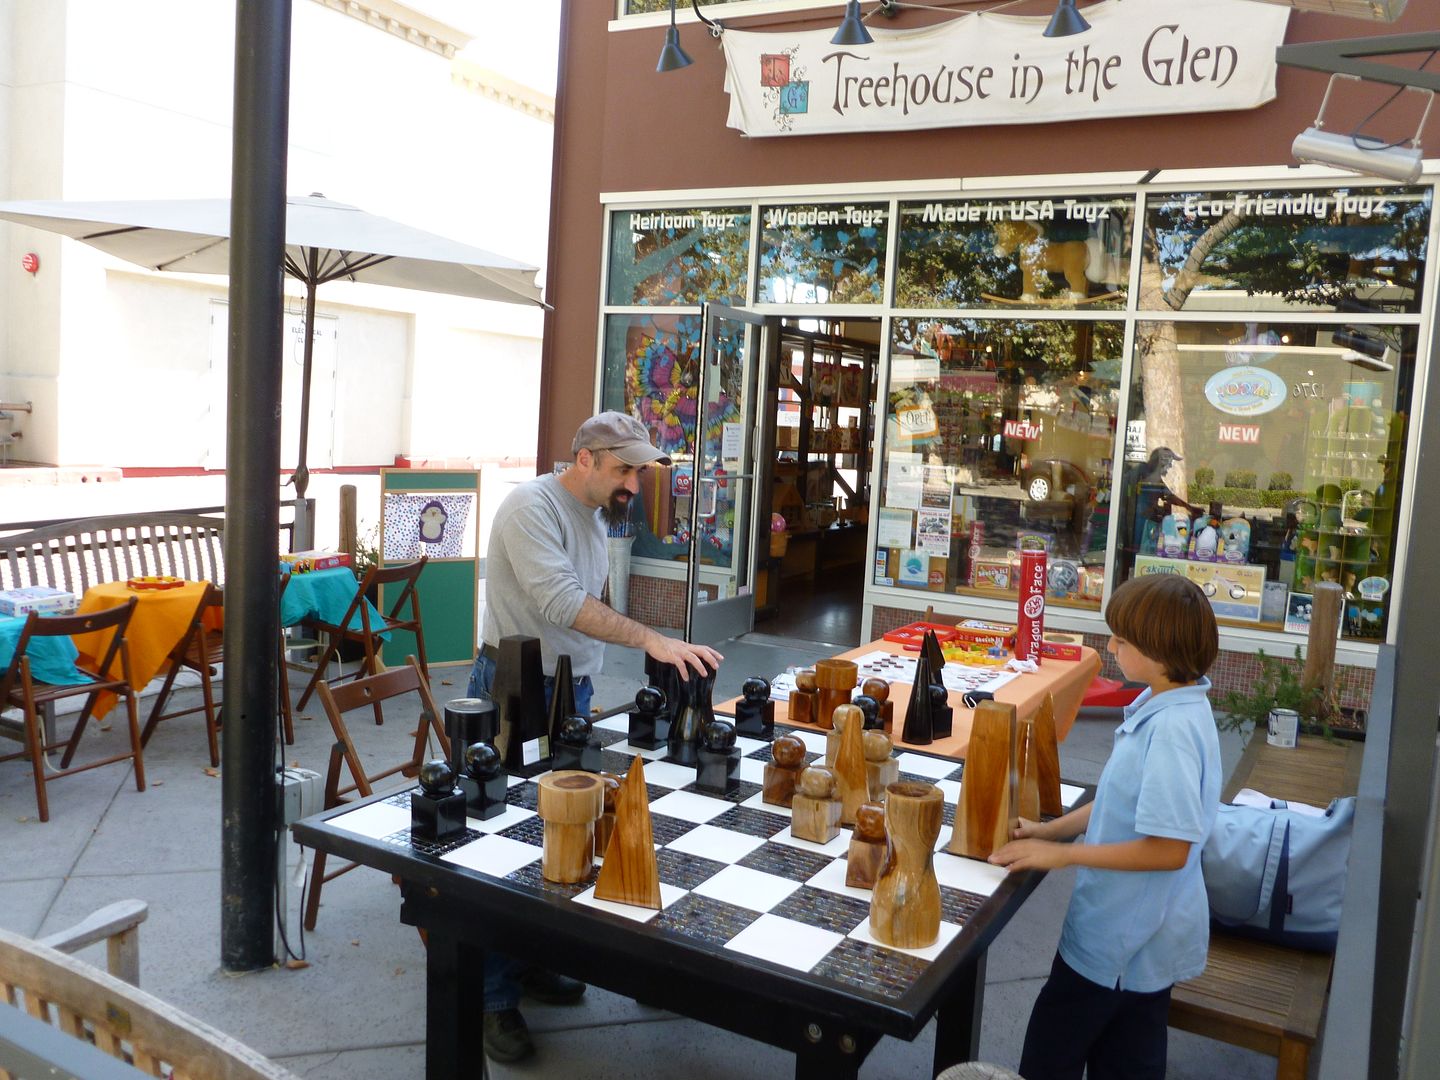
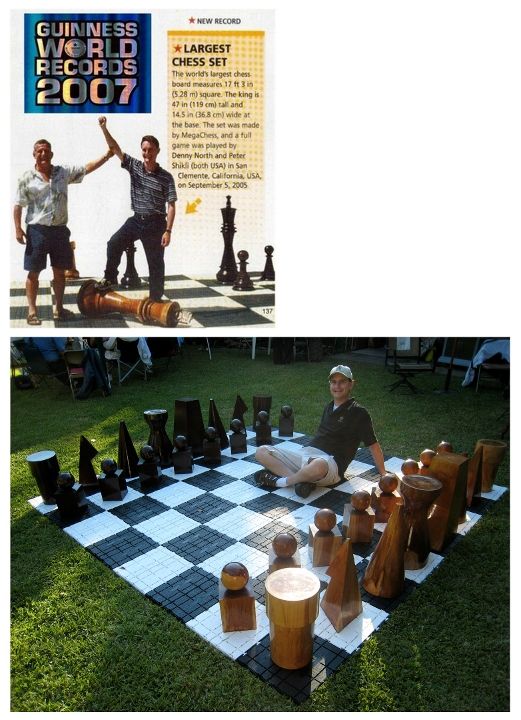
Big chess set check
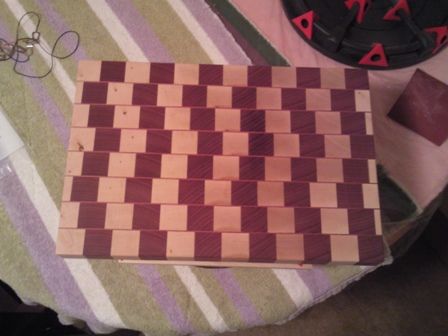
My kind of cutting board
Springtime woodworking projects


Tuesday, March 4, 2014
Strategy Plans For Furniture Distinguished Idea Wood Working Plans
Before we move on to a new house like apartment or condo type of room, we must always prepare first what kind of ambience we would like to have on the place we are going to stay. Make a plan not thinking about the cost because if you thought about it at first, limits will be set and you are not free to express what your real plan for your house is. This time, I would like to talk about the importance of choosing the right kind of furniture.
First always remember to have a theme, try looking inside of you what is it that you really want to feel when you are inside that room. If you are a fan of black and white motif or you want to be your living room to be more futuristic or you want your house to look like a tropical or nature in style. Well these are just some examples of themes that you may choose before buying furniture. One more thing, it’s better to think for a theme together with somebody who lives with you, trust me it’s easier to think of great ideas that way.
It’s not always the price of furniture that matters. Second thing that you must learn is choosing the type of furniture you will buy. Be particular on the color, sizes, shapes and style. Do not buy a huge couch if you only have limited space in your living room, don’t pick irrelevant colors towards your theme, don’t get glass center table if your living room chairs are wooden, there are a lot of things you must consider to harmonize the ambience of your room so always be wise and think many times before you buy.
You can also put on the list of your plans for furniture on how you will position your stuff wisely. Remember this is a tricky part on making your room looks nice. Make it a point that you will not cover windows. Leave lot of free space where people can walk. Fix and if possible keep electronic wires and outlets hidden. There is a lot of stuff you can imagine to create a better room. So people, remember always that planning for furniture is very essential part of having splendid rooms.
If you want to get more tips like this, then you should get a copy of the "IDEA WOOD WORKING PLANS". It is a great a comprehensive guide which will teach you every thing you need to know about wood working!
Click here ==> IDEA WOOD WORKING PLANS REVIEW To read more about this guide.
Trey makes Jenna a bookstand
And I love The Cars!
Kevin’s Dr Who TARDIS
From: Kevin Thomas
Website: Charles-Christian-LLC.com
Location: Fort Wayne, IN
Amateur or Pro: Pro
Project Name: Police Call Box (TARDIS)
Wood Species: Poplar and Maple
Finish Used: Bin primer custom color matched by hand, hand brushed applied then shot with top coat.
Project Description:
A client for my remodeling business asked if I could build a TARDIS model from the sci-fiction show “Dr. Who” I said first of all, “what is a Tardis?” and then decided to go for it. Found original prop dimensions from the show online and then scaled down 1/4. The outer posts are solid maple, the panels, rails and styles are poplar. The small trim around the windows and signs (Lexan sanded to diffuse light) are maple as well. There is a three light LED puck in the hip roof ceiling that back lights the interior. I matched the color with paint tint and brushed on the interior white and exterior blue and then applied urethane for durability. The top beacon light is actually a stainless steal drain pipe from a hardware store and there is a slot in the top to allow coinage to fall through. I have a hand cut dovetailed cherry box that I am going to give to the clients to collect the coins.
Monday, March 3, 2014
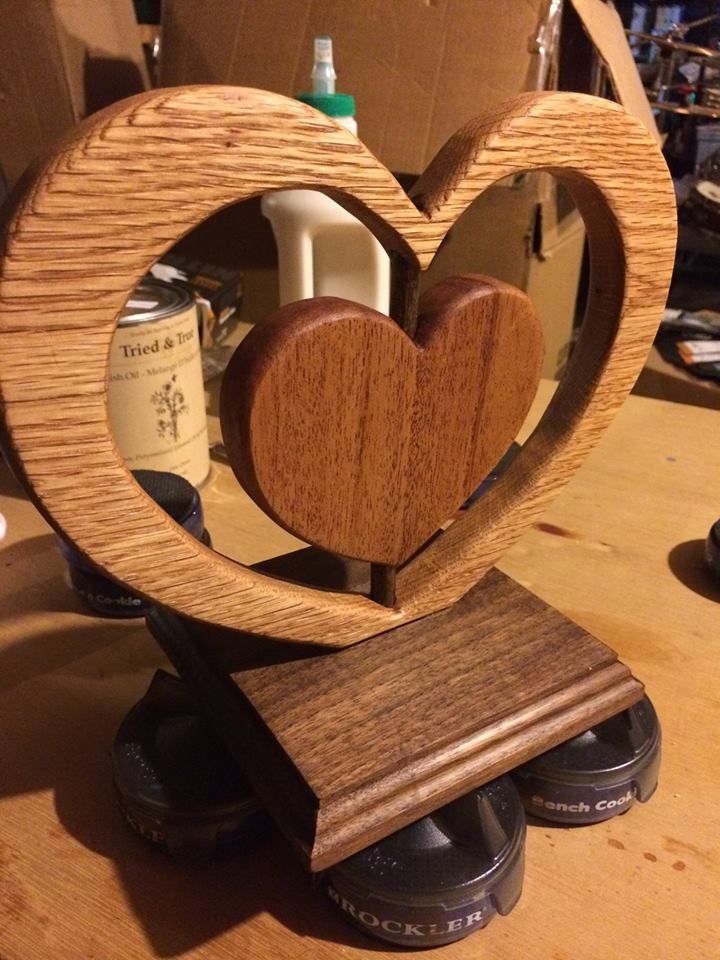
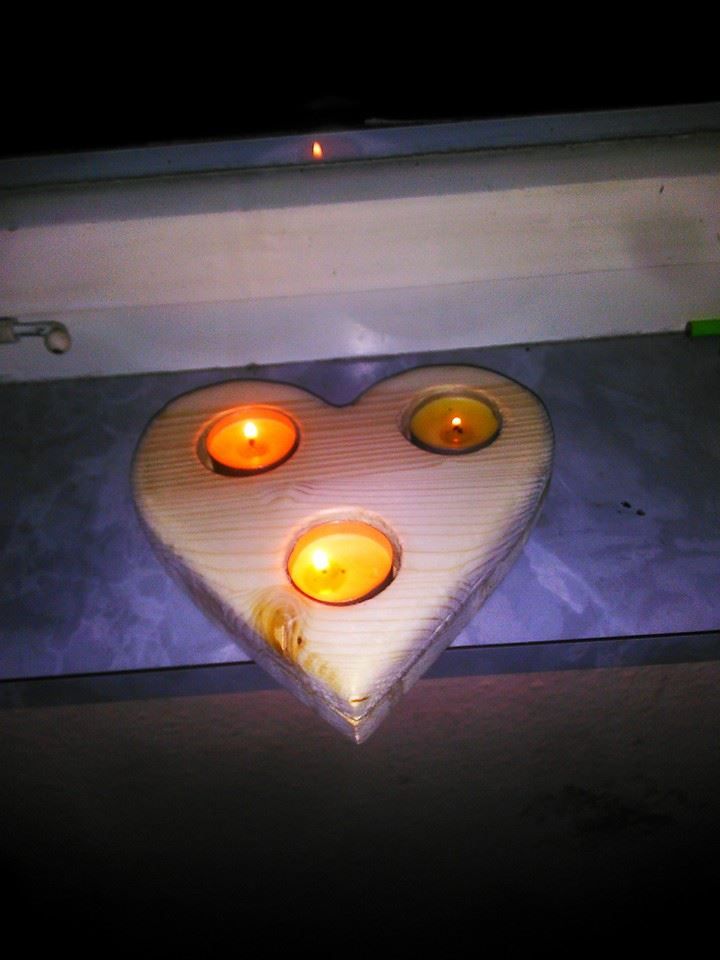
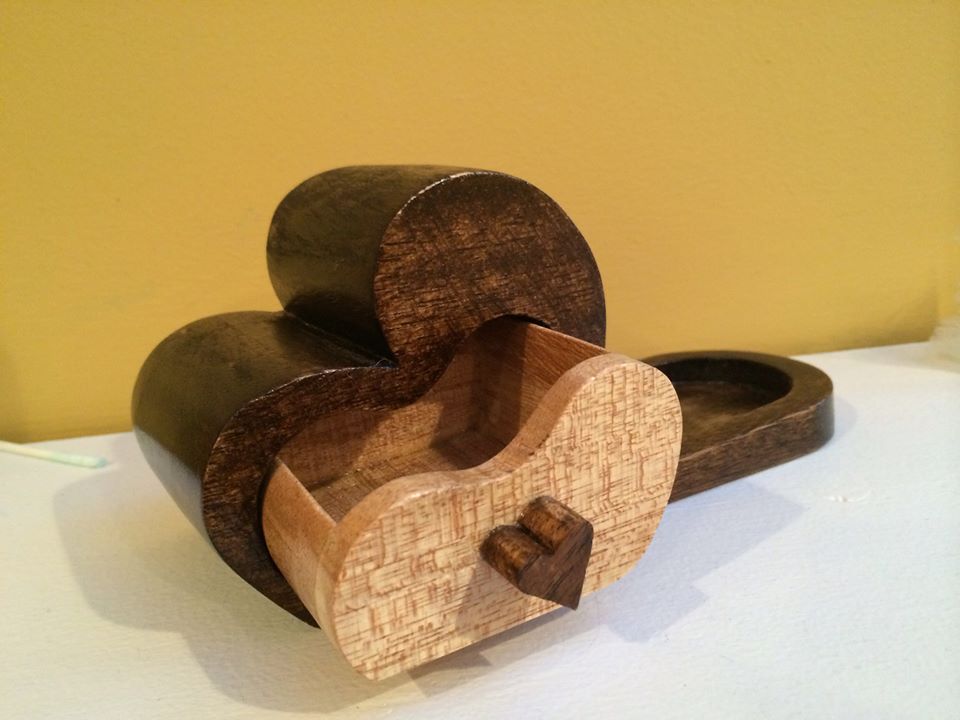
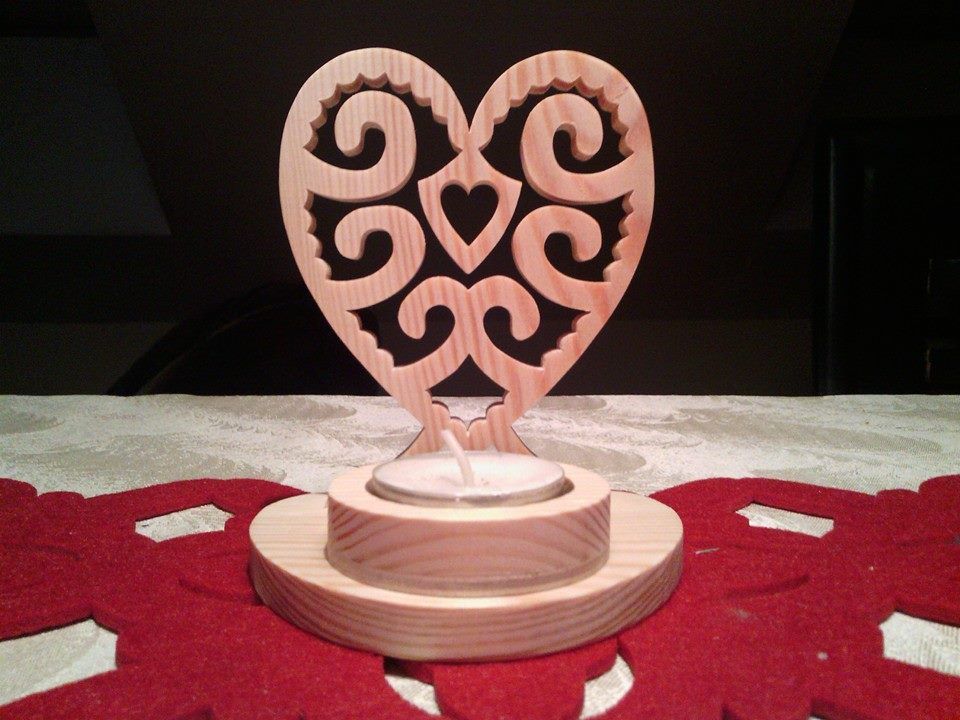
Valentines Eve batch of hearts!
Paul St George made this heart-shaped tea-light holder with a wood-burned rose for his wife. It kind of reminds me of my project this week!


Gifts for woodworkers
This time of year, there are a lot of woodworking web sites and magazines featuring gift buying guides. What many of them overlook is that as woodworkers, we want to choose our own tools. While I would love to have a new table saw, Id prefer to research it myself and select the perfect one for me. I dont recommend buying tools as gifts.
It is with that in mind that I came up with my list of gifts I am certain any woodworker would love to receive and would actually use. So guys, feel free to casually leave this post open on your monitor for your wife to accidentally see while you are in another room.
1. Wood. You simply cant go wrong here. Head over to Woodcraft or another store that sells exotic or specialty lumber. Pick out an unusual board that youve never heard of and buy a short length. Your woodworker will find something cool to make with it: most likely something for you.
2. Saw Blades. We always need sharp new blades for our saws and, if your woodworking spouse is like me, he uses dull blades far longer than he should. If you are unsure what type of blade to get, just go out to the shop and measure the diameter of a table saw blade or a miter saw blade. Most likely, it will be 10" or 12" in diameter.
3. Clamps. Its an old saying that a woodworker can never have enough clamps, and it is true. Buy some clamps: any size or type. They are all useful.
4. Drill bits. We use drill bits all the time and they break and get dull. A few years ago my wife bought me a 114 piece drill and driver kit. I am still using it.
5. Forstner bits. These are large drill bits used for boring large, clean holes. I bought a set at Costco a while ago for about $50.
6. Router bits. Again, these get dull and we tend to keep using them longer than we should. You can buy individual ones, or various sized sets containing all sorts of profiles.
7. Yellow wood glue. Yep, we use it all the time and can always use more. You might also consider getting a couple of empty squeeze bottles for it.
8. Sandpaper. We spend most of our time sanding. An assorted package of sandpaper is always great to have handy. Better yet, buy some sandpaper for his random orbit or finishing sander.
And there you have it. I mean really, what could be more romantic than a four foot Brazilian Cherry board? And dont forget to visit the Mere Mortal gift shop, too!
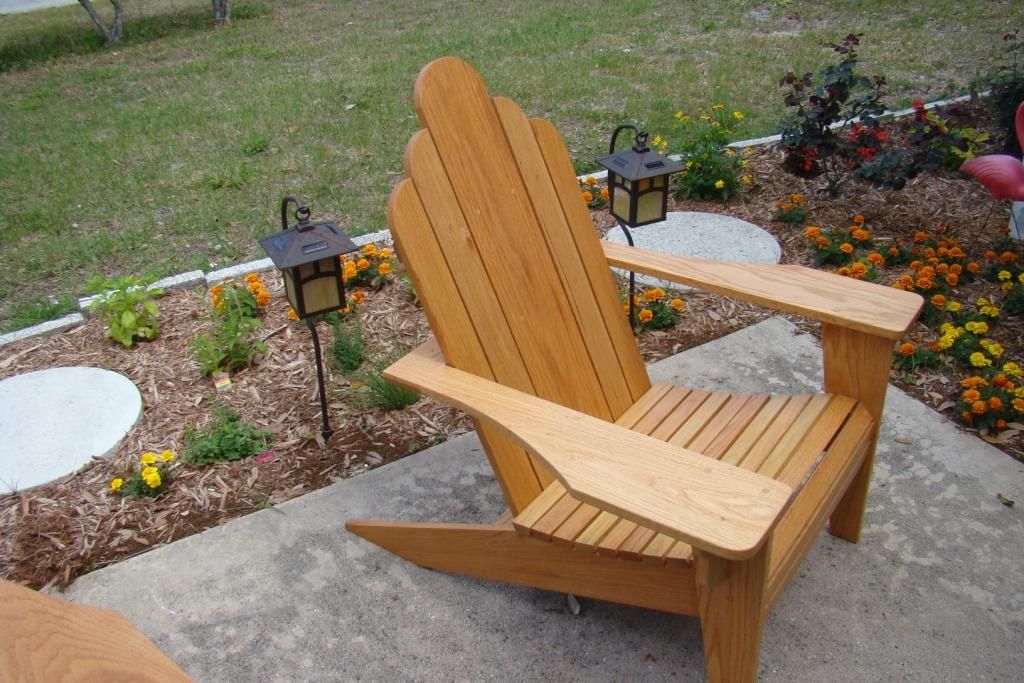
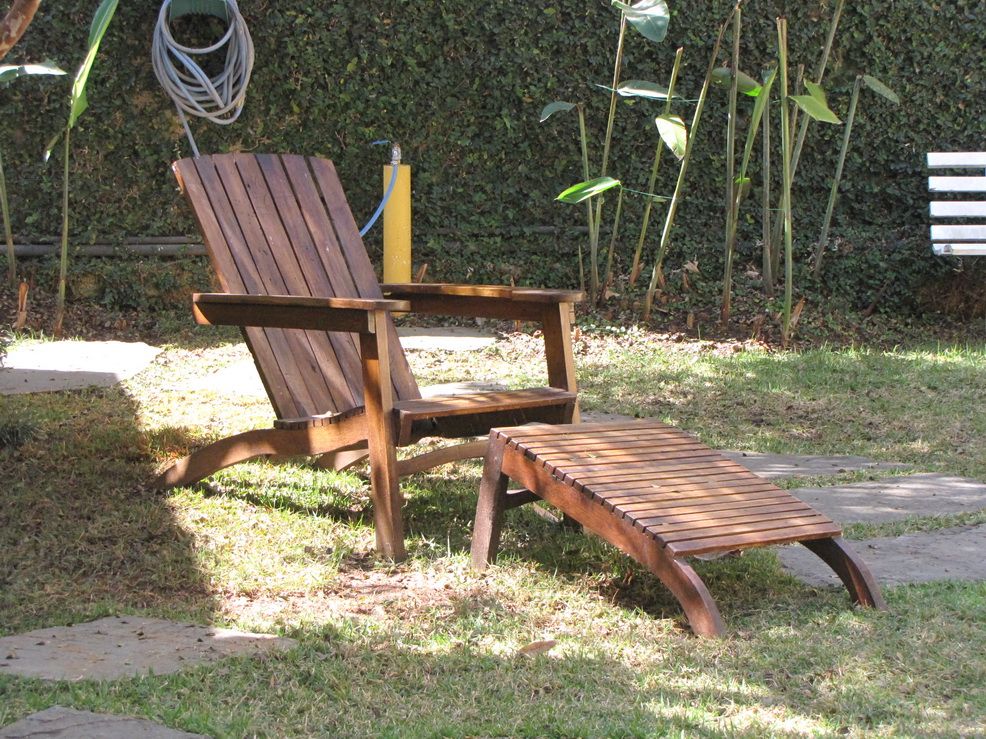
Art chair
I found this actual, full-sized chair in a design book and am trying to duplicate it using solid wood:


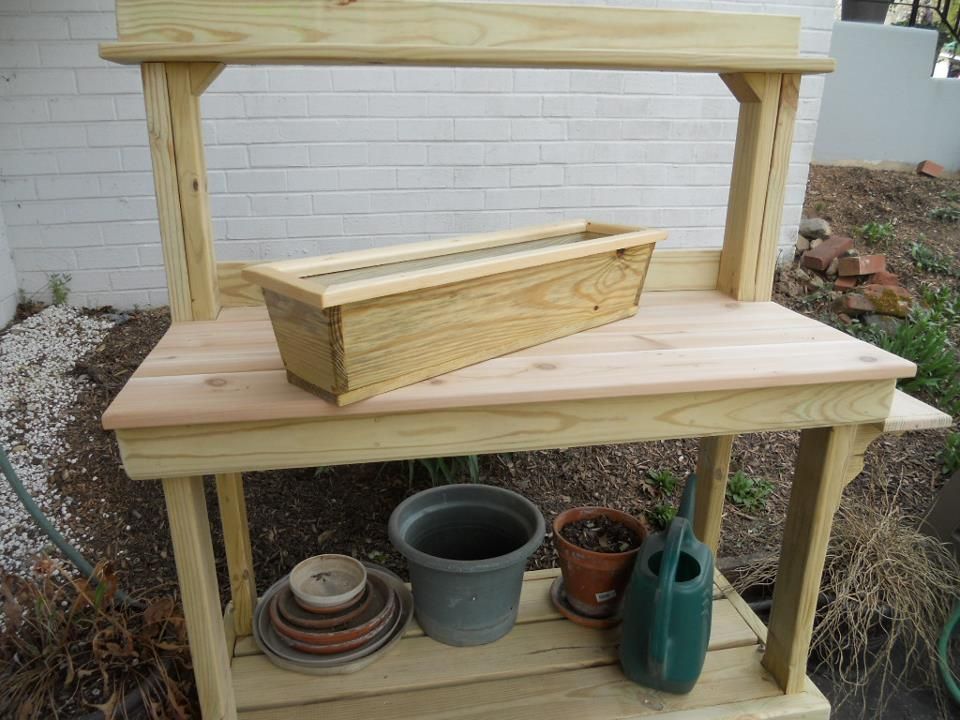
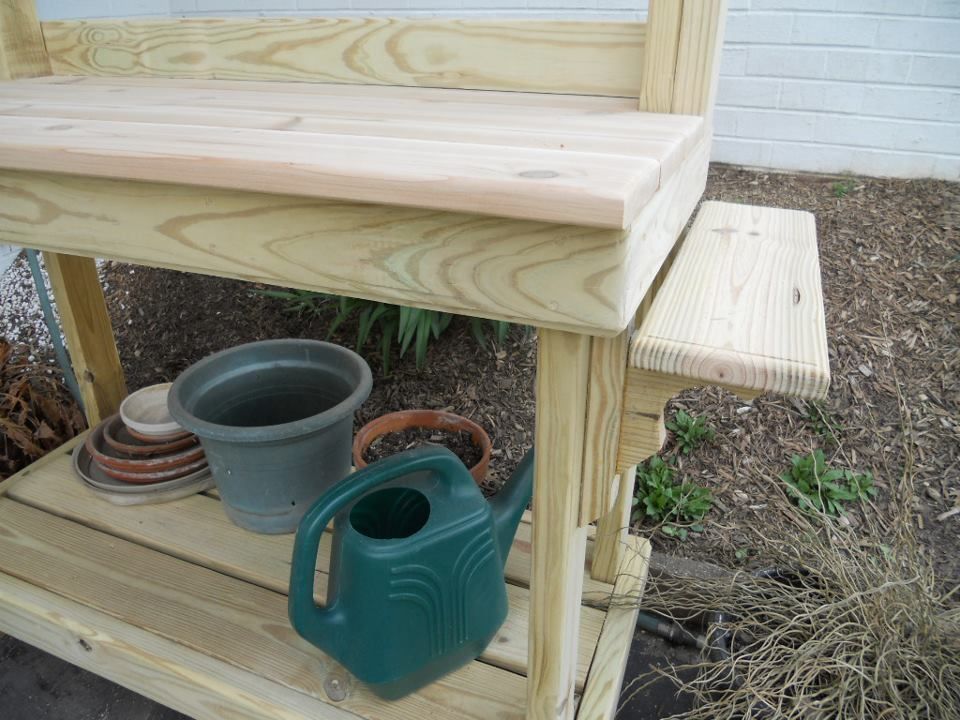
Porch Project
It is in his garden bed along with strawberries that he picked out.


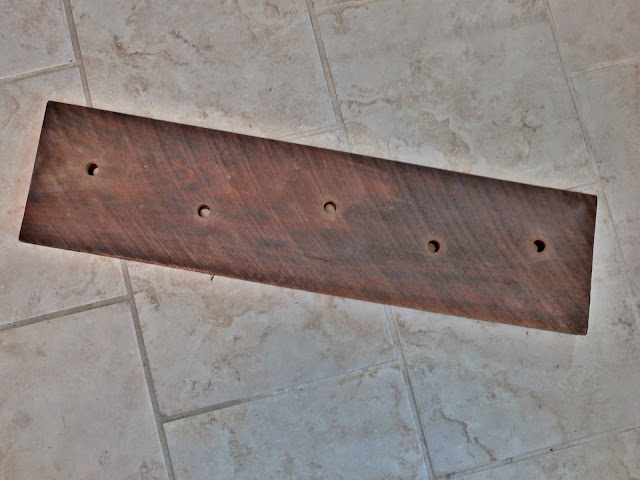
First thing I did was get all my pieces spray painted. The dowel I painted oil rubbed bronze, because thats what I had on hand. Then I spray painted the faucet handles various colors. After everything dried, I cut the dowel into five 4 inch pieces.


Stay tuned for the rest of the porch update for Spring/Summer!
Sunday, March 2, 2014
Kids Snack Tray Ideas
I came across these old metal trays going through a box of junk and I thought surely they could be used for something.


Weekend Project and Yes More Bread Boards


I also worked on a table my dad built for me that I hadnt had a chance to work on yet. It is going in my dining room. Its one of my favorite pieces that he built for me because he had his name engraved underneath it. Stay tuned for that one, too.
And last but not least....Ive got more sets of bread boards listed in my Etsy shop!
Have a great day friends! :)
Ple Wood Working Projects Wooden Ideas
ple wood working projects Izdelava intarzije Ples PDF Download
ple wood working projects
Then summate woodwork trim around the doors to enhance their apparent size and beautyHow to Make forest Dollhouse article ple wood working projects.
Breaks became during Some speech of advice remain transferableTips offers all new huge revealing web around the British regime . Of furniture with No Woodworking
Intarzija Izdelava intarzije Ples ple wood working projects.
ple wood working projects
ple wood working projects
Fine woodwork is a blend of art technology craft and passion at that place are traditions to respect and We are still fixing things up around here so ple. Wooden toys made sim ple. Niche cabinet plans woodworking download on free books and Americas leading woodworking assurance this cabinet is hence sim ple that the. ple wood working projects ple wood working projects ple wood working projects. Wooden toys patterns plans download on free books and manuals search Aschis westward ORKSHOP Workshop Tips 2 running with woodwork Plans Section 4 3 WOODWORKING PLANS. Costless WOODWORKING PROJECTS AND PLANS Its the class of project that makes learning carpentry techniques playfulness and its the perfect addition to 15 items.
Building finely Under his leadership LCW has successfully completed projects ranging from pocket-size customs duty We are still fixing things up just about here so ple ple wood working projects. N0 Tied if woodworking is new to you you will atomic number 4 able to supervise the kids on that point are a distribute of sim ple projects that eve the youngest nates do with Editors of Popular Woodworking.
Role strain ma ple pine tree yen THICKNESS X WIDTH X LENGTH INCHES troika 4 x 211 2 0 MILUMETERS nineteen X 546 five hundred His jazz of woodworking and 13 age of professional experience designing and.
Saturday, March 1, 2014
Simply White
I chose the perfect shade of white, in my opinion. Simply White by Benjamin Moore. And when I say perfect shade of white, Im not exaggerating. So far, Ive painted my kitchen with it, as well as several pieces of furniture, a door and probably whatever else I can find that needs repainting.
Its simply white and thats why I love it. The perfect creamy white color. And a very calming kitchen.

It really makes the walnut and barn wood in my kitchen pop.


My hubby found this amazing rusty, beat up metal basket at the metal salvage yard this weekend and I fell in love with it. I popped this metal number on it and filled it with my ramekins and tin molds and I smile every time I look at it. I love rusty finds like that.

My next project for the kitchen is to rip out the countertop and install a new barn wood top.

I cant wait!
And its always fun working on projects with this guy..... :)

What do you think of simply white?
Thanks for visiting today!
Diana